
Side Dishes
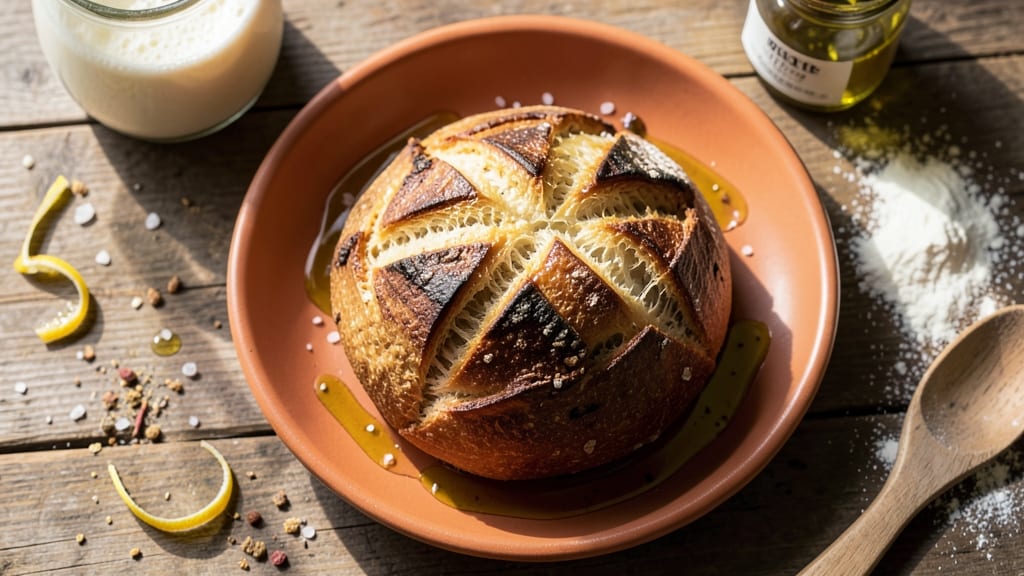
This Argentinian bread recipe delivers the iconic contrast of a crusty, chalky exterior with a soft, pillowy interior—just like the bread you'd find in Buenos Aires bakeries.
The secret lies in a precise blend of flour, water, and yeast, combined with a slow fermentation that develops deep flavor and that signature texture. I've perfected this recipe after years of testing, and it's become a staple in my kitchen for its ability to transform any meal.
The process begins with a simple dough made from high-gluten flour and water, which is kneaded just enough to develop gluten without overworking it.
The dough then undergoes a long, cold fermentation—either overnight in the fridge or for several hours at room temperature—that creates the perfect balance of crispness and softness. This step is non-negotiable for achieving that authentic Argentinian texture.
Once baked, the bread emerges with a golden, crackly crust that gives way to a tender, airy crumb inside—ideal for soaking up rich stews, pairing with grilled meats, or simply enjoying on its own.
The flavor is subtle but distinct, with a slight tang from the fermentation and a satisfying chewiness that keeps you reaching for another slice.
Whether you're serving it as a side for an asado or using it to make sandwiches, this bread is versatile enough for any occasion. The recipe scales easily, so you can bake a single loaf for a family dinner or double it for a crowd.
Ready to master the art of Argentinian breadmaking? Let's get started.
Ingredients for argentinian bread
High-gluten flour and slow fermentation create that iconic Argentinian bread texture you crave.
| Ingredient | Amount | Notes |
|---|---|---|
| High-Gluten Flour 🌾 | 4 cups | Bread flour or 00 flour for best texture |
| Active Dry Yeast 🍞 | ¼ oz | Or 2.25 tsp, ensure it's fresh |
| Granulated Sugar 🍚 | ½ tsp | Feeds yeast for fermentation |
| Salt 🧂 | 1 ½ tsp | Fine sea salt preferred |
| Water 💧 | 1 ½ cups | Lukewarm, 100-110°F |
| Olive Oil 🫒 | 1 tbsp | Extra-virgin for flavor |
| Cornmeal 🌽 | ¼ cup | For dusting baking sheet |
| Semolina Flour 🌾 | ¼ cup | For bread scoring |
The flour is non-negotiable here—high-gluten flour (like King Arthur or Caputo 00) gives that signature chalky crust. I always grab mine from Whole Foods or Amazon since regular all-purpose just won't cut it. The yeast needs to be fresh, so check the date on the package—if it's been sitting in your pantry for months, toss it. For the water, lukewarm is crucial (too hot kills the yeast, too cold slows fermentation). I use a thermometer to nail 100-110°F every time. The olive oil might seem small, but it adds subtle richness that makes this bread irresistible.
No high-gluten flour? Bread flour plus 1 tsp vital wheat gluten per cup gets you close. Yeast expired? Instant yeast works 1:1. The sugar can be swapped for honey (same amount), but it might darken the crust slightly. For scoring, if you don't have semolina, all-purpose flour works fine—just be gentle with the cuts. The dough should be slightly sticky but not wet; if it's too dry, add 1 tsp more water. If too wet, add 1 tbsp more flour. Trust your hands—this bread relies on feel more than exact measurements.
This dough is a patient one—let it ferment overnight in the fridge for maximum flavor and texture. Shape it into a loaf, cover with plastic, and it'll keep 3-4 days at room temp if wrapped tightly. For freezing, bake first, then slice and freeze portions—up to 3 months. The crust stays crisp even after reheating. I always bake two loaves: one for the week and one to freeze. Pro tip: Brush the baked loaf with olive oil while still warm for extra richness.
Why You'll Love This Recipe
- Four-Ingredient Magic: I swear, you only need flour, yeast, sugar, and water—no fancy add-ins. The high-gluten flour does all the heavy lifting, giving you that signature chewy texture without extra effort.
- Chewing Happiness: That first bite? Crust crackles, inside stays soft, and the yeasty warmth lingers. It’s not just bread—it’s the kind that makes you slow down and savor every pull.
- Weeknight Workhorse: Toss it in a basket for breakfast, tear it over soup, or freeze slices for quick toast later. Honestly, I’ve used it for everything from a sandwich base to a makeshift bowl—it never lets me down.
- Budget Baked Bliss: A loaf costs pennies to make and lasts days in the freezer. Between us, this is the bread that keeps my pantry stocked and my wallet happy—no guilt, just great flavor.
Step-by-step instructions for Argentinian bread with crusty crunch
Here's how to craft that iconic Argentinian bread with a chalky, shatteringly crisp exterior and a soft, airy interior.
Activate the Yeast for Maximum Rise
In a small bowl, combine the 1.5 cups water, 0.5 tsp granulated sugar, and 0.25 oz active dry yeast. Let it sit for 5-10 minutes until frothy—this confirms your yeast is alive and ready to work. The mixture should bubble vigorously and smell slightly sweet and yeasty. If it doesn't foam after 10 minutes, your yeast may be inactive, and you'll need to start over.
I like to use a thermometer here to ensure the water is between 100-110°F—too hot and you'll kill the yeast, too cold and it won't activate properly. The sugar jumpstarts fermentation, so don't skip it even if you're using sweet dough ingredients.
Mix the Dough with High-Gluten Flour
In a large mixing bowl, combine the 4 cups high-gluten flour and 1.5 tsp salt. Create a well in the center and pour in the yeast mixture along with the 1 tbsp olive oil. Using a wooden spoon or dough whisk, stir until a shaggy mass forms—this prevents gluten development too early, which can make the dough tough.
Once it comes together, turn it out onto a lightly floured surface and knead for 8-10 minutes by hand. You're looking for a smooth, elastic dough that springs back slowly when poked. The high-gluten flour is key here—it gives that signature chalky crust while maintaining a soft interior. If the dough feels sticky, add flour 1 tablespoon at a time until it's just manageable.
Bulk Ferment for Optimal Texture
Shape the dough into a ball, place it back in the bowl, and cover with a damp towel. Let it rise in a warm place (75-80°F) for 1-2 hours, or until it has roughly doubled in size. The dough should feel light and airy when pressed gently—this indicates proper fermentation. I like to do this on the countertop near the oven with the light on, which creates a warm, humid environment.
During this time, the yeast will consume sugars and produce carbon dioxide, creating those tiny air pockets that give the bread its pillowy interior. If your kitchen is cold, the dough may take longer to rise—patience is key here. Punch it down gently after the first hour to redistribute the yeast and encourage even fermentation.
Shape and Proof for Final Rise
Divide the dough into 4 equal pieces (about 1 pound each) and shape each into a round loaf. For the classic Argentinian look, roll each piece into a tight ball with smooth sides—this creates that signature round shape. Place them on a baking sheet dusted with 0.25 cup cornmeal, leaving space between them as they'll expand.
Cover loosely with the damp towel and let them proof for another 30-45 minutes until they've risen about 50% and feel light when pressed. The cornmeal dusting prevents sticking and adds a subtle crunch to the bottom crust. I like to use a bench scraper here to gently reshape any flattened pieces—this ensures even baking and a professional finish.
Bake for Crispy Crust and Soft Interior
Preheat your oven to 425°F with a baking stone or inverted baking sheet inside—this creates steam for that crispy crust. Brush the tops of the loaves with water and sprinkle generously with 0.25 cup semolina flour. The semolina adds texture and prevents sticking while scoring.
Bake for 20-25 minutes until the crust is deep golden brown and sounds hollow when tapped on the bottom. The interior should register 190-200°F on an instant-read thermometer. For that authentic chalky texture, I like to bake them until the crust is almost rock-hard—this is what gives Argentinian bread its signature crunch.
Let the bread cool on a wire rack for at least 30 minutes before slicing—this allows the steam to escape and prevents a gummy interior. The crust should be shatteringly crisp while the inside remains soft and airy. Serve warm with olive oil for dipping or use as the perfect base for sandwiches.
Pro Tips For Making Argentinian Bread
- Use Lukewarm Water: I learned this the hard way—yeast is picky. Water should feel like a warm bath, not a sauna or an ice pack. Too hot and it kills the yeast; too cold and it won’t activate. Test with your wrist: if it feels cool but not chilly, you’re golden.
- Weigh Your Flour: Spooning flour into the bowl? Stop. High-gluten flour is dense, and volume measurements lie. Use a kitchen scale for precision—aim for 500 grams of flour. I used to eyeball it, and my bread always came out either too dense or too crumbly.
- Let It Rise Twice: Skip the second rise, and you’ll get a flat, sad loaf. The first rise builds flavor, but the second develops that signature airy texture. Give it time—at least 1-2 hours, or until it’s puffy and jiggly when you poke it. (Yes, even if you’re impatient like me.)
- Steam the Oven: After shaping, spray the loaf with water and bake it in a hot oven (230°C/450°F) for the first 10 minutes. The steam locks in moisture and guarantees that crispy crust. I used to skip this, and my bread turned out dry—now it’s always perfect.
Essential equipment for perfect results
High-Gluten Flour Essentials
Your bread's signature texture starts with the right flour. I recommend King Arthur Bread Flour or Caputo 00 Flour—both deliver that perfect chalky crust. If you can't find them, mix 1 cup all-purpose flour with 1 tsp vital wheat gluten per cup for similar results.
The high protein content in these flours creates the elastic gluten network needed for that satisfying chew. 🌾
Yeast Activation Tools
A digital thermometer (like the OXO Good Grips) is your best friend for checking water temperature between 100-110°F. For yeast testing, I use a simple clear glass measuring cup—it lets you see the bubbles clearly.
A small whisk helps dissolve sugar faster, ensuring even yeast activation. Don't skip this step: dead yeast means no rise!
Kneading and Fermentation
For hand kneading, I use a lightly floured wooden board—it prevents sticking while letting you feel the dough's texture. A damp kitchen towel draped over the bowl during fermentation keeps moisture in.
For cold fermentation, a large plastic storage container works perfectly—it's airtight and maintains consistent temperature. I place mine in the fridge overnight for maximum flavor development.
Baking Stone and Scoring
A baking stone (like the Lodge Cast Iron) creates that professional oven spring. For scoring, I use a sharp razor blade or lamé tool—both cut cleanly through the dough.
A fine-mesh sieve makes dusting semolina flour effortless. The stone should be preheated for 30 minutes before baking to ensure even heat distribution throughout your loaves.
Cooling and Storage
Always transfer baked bread to a wire cooling rack to prevent soggy bottoms. For storage, I use beeswax food wraps—they keep bread fresh longer than plastic. A bread box maintains humidity, while paper bags prevent moisture loss.
For freezing, slice first and store in quart-sized freezer bags with parchment between slices to prevent sticking. 💫
Nutrition facts
Frequently asked questions about Argentinian bread
Why does Argentinian bread have such a thick, chalky crust?
The signature crust comes from using high-gluten flour and baking until it's almost rock-hard. The slow fermentation and high oven temperature (425°F) create that distinctive chalky texture while keeping the interior soft. This technique mimics traditional Argentine bakery methods where bread is baked until the crust develops maximum crunch.
Can I make this bread without a baking stone?
Place an inverted baking sheet on the middle rack while preheating. This creates steam that helps develop the crust. For even better results, try a cast iron skillet or Dutch oven—both mimic a baking stone's heat retention. Just be sure to preheat your substitute for at least 30 minutes before baking.
How do I know when the dough is properly kneaded?
The dough should be smooth, elastic, and spring back slowly when poked. For a perfect test, stretch a small piece—if it resists but doesn't tear and forms a thin membrane (1/8-inch thick), you're golden. High-gluten flour requires less kneading than all-purpose, so 8-10 minutes by hand is ideal. Over-kneading makes the bread tough.
What's the best way to store leftover Argentinian bread?
Wrap cooled bread tightly in beeswax wraps or a cotton towel to maintain moisture. Store at room temperature for 3-4 days or freeze sliced portions for up to 3 months. For reheating, wrap slices in foil and warm in a 350°F oven for 5-8 minutes to restore crispiness. Never store in plastic—it traps moisture and makes the crust soggy.
Can I add herbs or seeds to this dough?
Yes! Try adding 1 tbsp dried oregano, 1 tbsp sesame seeds, or 1 tsp garlic powder to the dough before shaping. For a sweet version, replace 0.5 tsp sugar with 1 tbsp honey and add 1 tsp cinnamon. Just reduce the water slightly if adding seeds—they absorb moisture. The key is keeping the dough's hydration balanced for proper texture.