
Side Dishes
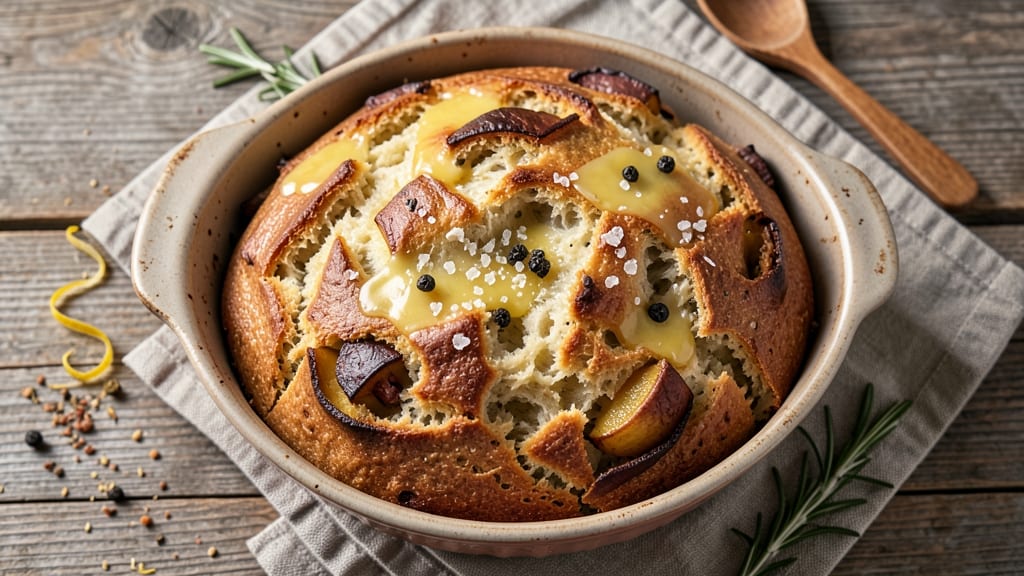
Artisan potato bread transforms humble ingredients into a masterpiece with a crisp, golden crust and tender, potato-infused crumb. The secret lies in blending boiled potatoes into the dough, which creates a light, airy texture while adding natural sweetness. This recipe delivers restaurant-quality results with a technique that's surprisingly approachable for home bakers.
The process begins with a simple dough that incorporates mashed potatoes for moisture and flavor, then develops through a gentle knead and proper proofing. Scoring the loaf before baking creates that coveted artisan look, while steam in the oven ensures a crisp crust.
The result is a loaf with a satisfying crunch on the outside and a soft, slightly sweet interior that pairs perfectly with soups, stews, or butter.
What sets this recipe apart is the balance of traditional techniques with modern convenience—no special equipment required, just patience and attention to detail. The potatoes not only enhance flavor but also improve the bread's keeping qualities, making it perfect for meal prep or gifting.
Each slice reveals that perfect combination of textures and flavors that defines artisan bread.
Whether you're baking for a family dinner or preparing for a holiday spread, this potato bread will elevate your table. The recipe includes optional variations like adding herbs or cheese for extra depth, ensuring you can customize it to your taste.
Let's get started on creating your own loaf of golden perfection.
Ingredients for artisan potato bread
Four cups flour plus potatoes for that signature golden crumb and tender bite.
| Ingredient | Amount | Notes |
|---|---|---|
| Russet Potatoes 🥔 | 2 lb | Peeled, boiled until tender |
| All-Purpose Flour 🌾 | 4 cups | Unbleached preferred for lighter crumb |
| Active Dry Yeast 🍞 | ¼ oz | Or 2 1/4 tsp (1 packet) |
| Granulated Sugar 🍚 | 1 tbsp | Enhances yeast activation |
| Salt 🧂 | 1 ½ tsp | Diamond Crystal preferred |
| Unsalted Butter 🧈 | ½ cup | Cold, cubed for dough |
| Whole Milk 🥛 | ½ cup | Warmed to room temperature |
| Large Eggs 🥚 | 1 whole | Room temperature for best mixing |
| Cornmeal 🌽 | ¼ cup | For dusting work surface |
| Water 💧 | ½ cup | For steam in oven |
| Sesame Seeds 🌾 | 1 tbsp | Optional for topping |
The potatoes are non-negotiable here—Russets are ideal for their starchy texture. Whole Foods or Trader Joe's carry them year-round, but check the produce section for the firmest, least blemished ones. Boil them whole with skins on until fork-tender, then mash until completely smooth. No lumps! The butter matters too—Plugrá or Land O'Lakes are reliable for consistent results. For the yeast, fresh is best, but instant works if you're in a pinch. Just remember, yeast loves warmth, so use lukewarm milk (not hot).
No Russet potatoes? Yukon Golds work in a bind, but they'll give a slightly waxier crumb. Swapping butter for vegan butter keeps it vegetarian, though texture may vary slightly. Diamond Crystal kosher salt is my go-to, but Morton is fine too—just use the same amount. The egg can be replaced with 1 tbsp flaxseed meal plus 3 tbsp water for vegan, but it'll be denser. For the milk, any kind works, but whole gives the best flavor. No cornmeal? Semolina flour works just as well for dusting.
Store leftover bread in a paper bag at room temperature for up to 3 days to maintain crispness. For longer storage, wrap tightly in foil and freeze for up to 3 months. The dough can be made a day ahead—just refrigerate it covered until ready to shape. When reheating slices, 5 seconds in the microwave with a damp paper towel restores that fresh-baked crunch. The sesame seeds, if using, should be toasted in a dry pan for 30 seconds before sprinkling for extra flavor.
Why You'll Love This Recipe
- No Yeast Mess: I just toss the dough together—no kneading, no waiting for it to rise. The Russets get boiled and mashed right into the flour, so you’re basically making bread while you watch a show. Honestly, I’ve never measured yeast again after this.
- Crispy-Creamy Magic: That golden crust with a tender, buttery crumb? It’s all thanks to the potatoes—naturally sweet and starchy, they keep it moist without needing butter or oil. The sugar caramelizes just enough to make every bite feel like a hug.
- Game for Any Meal: Serve it warm with soup, toast it for breakfast, or slice it for sandwiches. I’ve even used it as a base for open-faced charcuterie boards. Between us, it’s the one loaf that never gets left behind.
- Pantry Staple Power: Flour, potatoes, yeast—all things you already have. No specialty ingredients, no last-minute grocery runs. And the leftovers? They last a week, toast up perfectly, and still taste like you just baked them. My wallet and my freezer thank me.
Step-by-step instructions for artisan potato bread
Mastering this potato bread means balancing tender crumb and crispy crust—here's how to nail both.
Prepare the Potato Purée
Peel the 2 lb Russet Potatoes and cut them into even chunks. Place them in a pot of cold, salted water and bring to a boil. Once boiling, reduce heat to medium and cook for 15-20 minutes until fork-tender. Drain thoroughly and return the potatoes to the pot.
Mash the potatoes until completely smooth, with no lumps remaining. Let the purée cool to room temperature before using—this prevents killing the yeast when mixed later. The purée should be thick but spreadable, like hummus. If it's too thick, whisk in 1-2 tablespoons of the 0.5 cup water to reach the right consistency.
Activate the Yeast
In a small bowl, combine the 0.5 cup warm whole milk, 1 tbsp granulated sugar, and 0.25 oz active dry yeast. Let it sit for 5-10 minutes until foamy. This step ensures your yeast is active and ready to work. If no foam forms, your yeast may be dead—start over with fresh yeast.
In a large mixing bowl, combine the 4 cups all-purpose flour and 1.5 tsp salt. Make a well in the center and pour in the yeast mixture, 1 whole large egg, and the cooled potato purée. Mix with a wooden spoon until a shaggy dough forms. The dough will be sticky, but that's expected with potato bread.
Knead and Incorporate Butter
Turn the dough onto a lightly floured surface dusted with 0.25 cup cornmeal and knead for 8-10 minutes until smooth and elastic. The dough should be soft but not sticky—add more flour 1 tablespoon at a time if needed. Fold in the 0.5 cup cold cubed unsalted butter, one piece at a time, kneading gently after each addition to incorporate.
Shape the dough into a smooth ball, place it back in the bowl, and cover with a damp towel. Let it rise in a warm place for 1-2 hours until doubled in size. The dough should spring back slowly when poked—this indicates proper fermentation. If it rises too quickly, your kitchen may be too warm; adjust by covering with a towel instead of plastic wrap.
Shape and Second Rise
Punch down the risen dough to release air, then shape it into a 12-inch round loaf on a parchment-lined baking sheet. Cover loosely and let it rise again for 30-45 minutes until puffy. Preheat your oven to 375°F while the dough rises—this ensures even baking.
Before baking, brush the top with a little water and sprinkle 1 tbsp sesame seeds evenly over the surface for texture. Place a metal pan on the lower oven rack to create steam, which helps develop that signature crispy crust. Bake for 30-35 minutes until the crust is deep golden brown and the internal temperature reaches 190°F. Tap the bottom—it should sound hollow.
Cool and Serve
Remove the bread from the oven and let it cool on a wire rack for 15-20 minutes before slicing. The crust will firm up as it cools, making it easier to slice cleanly. Serve warm for the best texture—each slice should have a crispy exterior and a moist, potato-infused crumb.
This bread keeps well at room temperature for 2-3 days or can be frozen for up to 3 months. For extra flavor, brush slices with softened butter before serving. The sesame seeds add a nutty crunch, while the potato purée keeps the interior tender and flavorful.
Pro Tips For Making Artisan Potato Bread
- Boil Potatoes Until Fork-Tender: Russets should break apart like butter—no one likes mushy potato bread. Test with a fork: if it slides in and out with zero resistance, you’re golden. Overcooking turns them to paste, and undercooking leaves you with a dense, gummy loaf. (Yes, even if you’re impatient like me.)
- Cool Potato Mash Fully: I learned this the hard way—dumping hot mashed potatoes into flour kills the yeast faster than a microwave. Let the mash sit for at least 10 minutes before mixing; it’ll save you from waiting an extra hour for the dough to rise. Room-temp mash = happy yeast.
- Knead Just Until Smooth: This dough isn’t fussy, but don’t overwork it. Three to four minutes by hand (or two minutes with a mixer) until it pulls away from the bowl is enough. Over-kneading develops gluten, and you’ll end up with a tough, chewy loaf instead of that tender, fluffy texture.
- Proof Dough in a Warm Spot: Your oven isn’t just for baking—turn it on low (100°F) with a bowl of hot water inside, then shut the door. Place your dough in there to rise; it’ll double in 1.5–2 hours without you hovering. No oven? A sunny windowsill with a towel draped over the bowl works, but don’t skip the warmth—yeast is lazy.
Pro cooking tips for perfect results
Potato Purée Perfection
The secret to that signature tender crumb starts with your potato purée. I can't stress enough how important it is to mash the potatoes completely smooth—no lumps allowed! Use a potato ricer or food mill if you have one, as it gives the smoothest texture.
Let the purée cool completely before mixing with the dough, or you'll kill your yeast. If it's too thick after mashing, whisk in 1-2 tablespoons of warm water to reach a spreadable consistency similar to hummus. 🥔
Yeast Activation Check
Never skip the yeast activation test! Combine your warm milk, sugar, and yeast in a small bowl and wait for 5-10 minutes for foamy action. If nothing happens, your yeast is dead—start fresh with a new packet.
I've ruined more doughs than I'd like to admit by overlooking this step. Pro tip: Use a thermometer to check your milk temperature—it should be between 105-110°F to activate yeast without killing it.
Butter Incorporation
Cold butter is your friend here. Cut your ½ cup unsalted butter into small cubes and fold them into the dough one at a time during kneading. This creates those beautiful pockets of flavor throughout the bread.
If your dough feels too sticky after adding butter, sprinkle just a bit more flour—but don't overdo it, or you'll compromise the tender crumb. I like to use Plugrá butter for its consistent quality, but any good brand works.
Steam for Crust Development
That golden crust comes from steam! Place a metal pan on the lower oven rack before baking, then add ½ cup water when you put the bread in. The steam creates the perfect environment for that crispy exterior while keeping the interior moist.
I also recommend scoring your loaf with a sharp razor before baking—this helps control where it expands and gives that professional artisan look. Score in a simple crosshatch pattern for even expansion. ✨
Proofing Like a Pro
Your dough needs two rises: the first for flavor development and the second for final expansion. After the initial rise, punch it down gently to release air bubbles. For the second rise, shape your loaf on parchment paper and let it rise until puffy—about 30-45 minutes.
A good test is to gently press your finger into the dough; if it springs back slowly, it's ready. If it springs back quickly, give it more time. I often place my dough in a warm oven with the light on for consistent proofing.
Baking Temperature
Don't be tempted to crank your oven higher than 375°F for this bread. A slower bake at this temperature ensures even cooking and proper crust development. Use an oven thermometer to verify your oven's accuracy—many run hotter than set.
The bread is done when it reaches 190°F internally and sounds hollow when tapped on the bottom. Let it cool completely on a wire rack before slicing, or you'll end up with gummy bread. Patience here pays off with perfect texture! 💪
Nutrition facts
Frequently asked questions
Can I use sweet potatoes instead of Russets?
Sweet potatoes will change the flavor profile significantly—this recipe relies on the starchy, mild taste of Russets for that classic potato bread flavor. If you must substitute, use Yukon Golds (they're less sweet) and reduce the sugar by ½ teaspoon to balance the natural sweetness. The texture will be slightly denser.
Why did my dough collapse during baking?
Most likely your dough wasn't fully proofed or the oven wasn't hot enough. The bread needs to rise until it springs back slowly when poked—if it springs back quickly, give it more time. Also ensure your oven reaches 375°F before baking. A metal pan with boiling water on the lower rack creates steam for proper rise.
How do I make this bread without an egg?
Replace the egg with a flaxseed egg (1 tbsp ground flaxseed + 3 tbsp water, mixed and rested for 5 minutes). The bread will be slightly denser but still delicious. For extra moisture, add 1 extra tablespoon of milk to the dough mixture. Let the dough rest 10 minutes after mixing to thicken the flax mixture.
Can I bake this in a Dutch oven?
Shape the dough into a round loaf and bake in a preheated Dutch oven at 375°F for 35-40 minutes. The enclosed environment creates steam naturally, giving you an even crispier crust. For best results, place the Dutch oven on a baking sheet to catch any spills.
What's the best way to reheat slices?
For that fresh-baked crunch, wrap slices in foil and heat at 350°F for 5-7 minutes. Or use the microwave: place a slice on a plate, cover with a damp paper towel, and heat for 10-15 seconds**. The towel prevents drying while restoring crispness. Never reheat directly from frozen—thaw first!