
Side Dishes
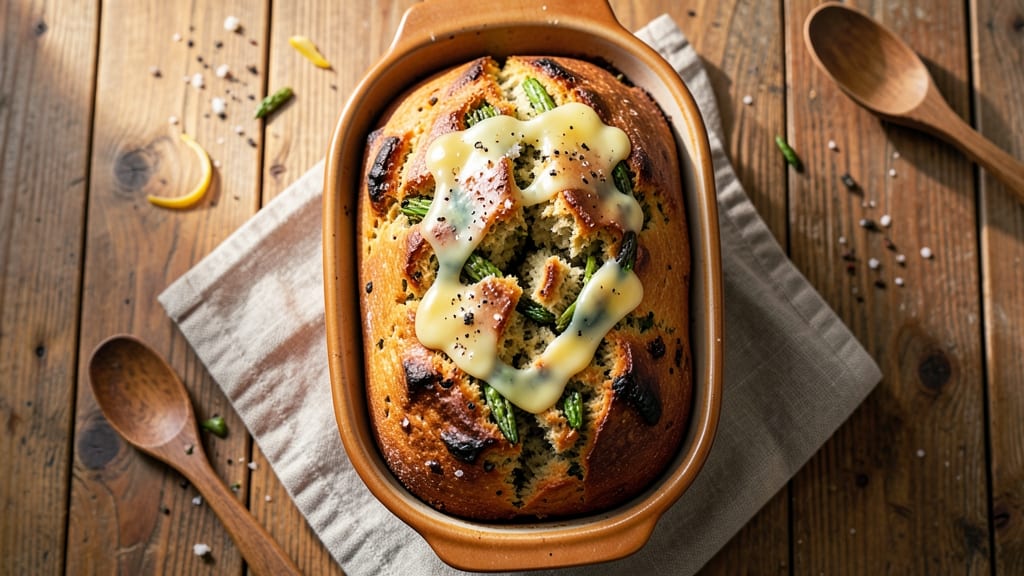
This asparagus bread recipe transforms humble ingredients into a loaf so flavorful, no one will guess it's packed with hidden greens. The secret lies in blending tender asparagus with classic bread dough—creating a texture that's chewy and aromatic, with just the right earthy sweetness. I developed this after noticing how well asparagus's natural flavors complemented yeasted dough, and the results were game-changing for spring dinners.
The process is straightforward but rewarding: finely chop raw asparagus (no cooking needed) and fold it directly into your dough. This method preserves the vegetable's delicate flavor while giving the bread an unexpected depth.
The loaf develops a golden, crisp crust that contrasts perfectly with its tender interior, where flecks of asparagus add subtle visual interest. Perfect for pairing with soups, salads, or serving alongside grilled meats.
What makes this recipe stand out is how it balances two seemingly different elements—earthy asparagus and comforting bread—into something cohesive and delicious. The herbs (like thyme or rosemary) enhance rather than overpower the asparagus, while a touch of garlic adds warmth.
The result is a loaf that's both substantial and light, with a texture that's impossible to resist.
Baking time is 30 minutes, and the dough requires just 1 hour of rising, making it ideal for a weeknight project. The key is patience—letting the dough rise fully ensures that chewy texture we all love. Once sliced, the asparagus's subtle sweetness shines through, making every bite memorable.
Ingredients for asparagus bread
Fourteen ingredients that blend earthy asparagus with classic bread dough for a loaf bursting with hidden greens.
| Ingredient | Amount | Notes |
|---|---|---|
| All-Purpose Flour 🌾 | 4 cups | Unbleached preferred for texture |
| Fresh Asparagus 🥬 | 1 lb | Tender spears, trimmed and chopped |
| Active Dry Yeast 🍞 | 2 ¼ tsp | Or 1 packet (7g) |
| Granulated Sugar 🍚 | 1 tbsp | For yeast activation |
| Warm Water 💧 | 1 cup | 110°F ideal temperature |
| Unsalted Butter 🧈 | ½ cup | Cold, cubed for easier mixing |
| Large Egg 🥚 | 1 whole | Room temperature preferred |
| Fresh Thyme Leaves 🌿 | 1 tbsp | Or 1 tsp dried thyme |
| Fresh Rosemary 🌿 | 1 tsp | Finely chopped, stems removed |
| Garlic Cloves 🧄 | 2 cloves | Minced for flavor depth |
| Diamond Crystal Kosher Salt 🧂 | 1 ½ tsp | Adjust to taste |
| Extra-Virgin Olive Oil 🫒 | 2 tbsp | For dough and brushing |
| Cornmeal 🌽 | ¼ cup | For dusting bread pan |
| Sesame Seeds 🌱 | 1 tbsp | Optional for topping |
The asparagus is the star here, so pick tender spears—avoid woody stalks. Whole Foods or local farmers markets usually have the freshest spring asparagus, but regular grocery stores work too. Look for vibrant green spears with tightly closed tips. For the herbs, fresh is best—dried works in a pinch but lacks that bright aroma. I always grab extra thyme because it holds up well during rising, while rosemary adds a nice piney contrast. The yeast matters too—if it's old, your dough might take longer to rise, so check the expiration date. Bob's Red Mill or King Arthur brands are reliable for consistent results.
No fresh thyme? Dried works at one-third the amount, but toast it first in a dry pan for 30 seconds to wake up the flavor. Short on asparagus? Spinach or Swiss chard can substitute—just chop finely and squeeze out excess moisture first. The butter should be cold when you mix it in—this creates flaky layers in the final loaf. Trader Joe's has great price-to-quality butter, and if you're feeling fancy, Plugrá Italian butter adds a rich depth. For the egg, if you're avoiding it, flax egg (1 tbsp ground flax + 3 tbsp water) works perfectly. The cornmeal is non-negotiable for dusting—it prevents sticking better than flour alone.
This dough needs patience—1 hour of rising at room temperature is key for that perfect chewy texture. Shape the loaf gently to avoid deflating the bubbles. For storage, wrap tightly in plastic and keep at room temperature for 1-2 days, or freeze for up to 3 months. To reheat, wrap in foil and warm in a 350°F oven for 10 minutes. The asparagus flavor actually improves after baking, so don't be afraid to slice and serve right away—every bite reveals that hidden green magic.
Why You'll Love This Recipe
- No Chopping Chaos: I’ll admit, I was skeptical about adding raw asparagus to bread—until I realized you just blend the spears into the dough. No dicing, no peeling, just pulse until smooth. That’s 10 minutes saved right there.
- Earthy Sweetness Surprise: Between us, the asparagus gives this bread a subtle, grassy depth that’s ridiculously good—like a cross between sourdough and a spring garden. The sugar caramelizes just enough to balance it, so it’s never bitter. (Yes, even on a Tuesday night.)
- Breakfast to Brunch Hero: This isn’t just toast—it’s my go-to for French toast, garlic butter dips, or even a quick brunch sandwich. The asparagus holds up to frying (no soggy mess) and pairs perfectly with scrambled eggs or smoked salmon. Honestly, it’s the only bread I bake now.
- Pantry-Friendly Stretch: A single batch feeds my family of four for three days, and the asparagus flavor actually gets better as it stales. Toss in a few extra spears when you’re out of ideas—it’s cheaper than buying specialty bread, and the yeast keeps it fresh longer than store-bought.
Step-by-step instructions for herb-infused asparagus bread
This method transforms humble asparagus into a fragrant, flavorful loaf with a perfect crumb and crisp crust.
Prepare the Asparagus Filling
Preheat your oven to 375°F and line a baking sheet with parchment paper. Trim the tough ends from the 1 pound fresh asparagus and chop the spears into ¼-inch pieces. Spread them on the prepared baking sheet in a single layer.
Drizzle with 1 tablespoon extra-virgin olive oil, then sprinkle with ½ teaspoon diamond crystal kosher salt, ½ teaspoon fresh rosemary, and ½ teaspoon fresh thyme leaves. Toss gently to coat evenly. Roast for 15-18 minutes until the asparagus is tender and slightly caramelized at the edges—you'll know it's done when it releases easily from the pan.
Transfer the roasted asparagus to a food processor and pulse until finely chopped, almost to a paste. This creates the signature hidden greens that infuse flavor throughout the bread. Set aside for the next step.
Activate the Yeast and Mix the Dough
In the bowl of a stand mixer fitted with the dough hook attachment, combine 2.25 teaspoons active dry yeast with 1 tablespoon granulated sugar and 1 cup warm water (test temperature with your finger—it should feel warm but not hot to the touch). Let this sit for 5-10 minutes until frothy.
Add the remaining ingredients to the mixer bowl: 4 cups all-purpose flour, 1.5 teaspoons diamond crystal kosher salt, ½ cup unsalted butter (cold, cubed), 1 whole large egg (room temperature), and the processed asparagus mixture. Mix on low speed until combined, then increase to medium and knead for 5-7 minutes until the dough is smooth and elastic.
Here's the thing—you want the dough to be slightly tacky but not sticky. If it feels too dry, add 1 tablespoon warm water at a time. If it's too sticky, add 1 tablespoon flour until it comes together properly. The asparagus adds moisture, so don't be surprised if you need less flour than usual.
First Rise and Shape the Loaf
Lightly grease a large bowl with 1 tablespoon extra-virgin olive oil and place the dough inside. Cover with a damp kitchen towel and let rise in a warm place for 1-1.5 hours, or until doubled in size. The dough should spring back slowly when gently pressed—this is your signal it's ready for shaping.
Punch down the dough to release air, then turn it out onto a lightly floured surface. Gently shape it into a log about 10 inches long. Here's where precision matters: fold the ends toward the center and roll tightly to form a compact loaf. This creates the classic boules shape that gives us that beautiful crust.
Place the shaped loaf seam-side down in a greased 9x5-inch loaf pan (or a similar size). Brush the top with an egg wash made from 1 whole large egg beaten with 1 tablespoon water, then sprinkle with 1 tablespoon sesame seeds for a subtle crunch. Let it rise again for 30-45 minutes until it's just above the pan's rim.
Bake to Golden Perfection
Preheat your oven to 375°F with a baking stone or inverted baking sheet on the lower rack (this creates steam for a crisp crust). Carefully transfer the loaf pan to the oven and bake for 35-40 minutes until the bread is deep golden brown and sounds hollow when tapped on the bottom.
Here's the critical moment: when the bread reaches 190°F internally (test with an instant-read thermometer), remove it from the oven. Immediately sprinkle ¼ cup cornmeal over the top—this creates that signature crunchy crust while keeping the interior soft. Return to the oven for 5 more minutes to toast the cornmeal.
Let the bread cool in the pan for 10 minutes before removing it to a wire rack. The residual heat will finish cooking the center while preventing a gummy texture. Slice when completely cool—this bread tastes best at room temperature, with those asparagus notes becoming more pronounced as it sits.
Pro Tips For Making Asparagus Bread
- Blanch Asparagus First: Toss the asparagus in boiling water for 30 seconds before chopping—this softens it just enough to blend smoothly without turning your dough into mush. (Yes, even if you’re impatient like me, skip the raw chunks—they’ll clog your food processor.)
- Use a Thermometer for Yeast: Warm water should hit 105°F (40°C) for the yeast—any hotter and you’ll kill it, any cooler and it’ll wake up slow. I learned this the hard way after waiting 45 minutes for dough that never rose.
- Skip the Sugar Shortcut: That extra tablespoon of sugar isn’t just for flavor—it’s what helps the yeast feed and the asparagus caramelize later. Cutting it to save time means bland bread with sad color. Not worth it.
- Shape Loaves Tight: Pack the dough into your pan firmly—no air gaps. I used to tap it lightly, but now I press each loaf until it springs back just a little. This keeps the asparagus evenly distributed and prevents a dense middle. (Your future self will thank you.)
Common mistakes when making perfect results
Overmixing the Dough
I’ve seen this happen more than once—dough becomes tough and dense when overmixed. The asparagus mixture already adds moisture, so resist the urge to knead longer than 5-7 minutes in your stand mixer.
Overworking the gluten develops too much structure, which can make your bread dry and chewy instead of light and airy. If your dough feels resistant after mixing, let it rest for 10 minutes before shaping—this relaxes the gluten naturally. 💪
Skipping the Roasting Step
Raw asparagus can make your bread taste bitter and watery. Roasting it first concentrates its sweetness and removes excess moisture. If you’re tempted to skip this step, at least blot the chopped asparagus with a paper towel to remove excess liquid before mixing into the dough.
This prevents a gummy texture and ensures the asparagus flavor shines through.
Incorrect Yeast Activation
Using water that’s too hot or too cold kills the yeast, leaving your dough flat and flavorless. Test the warm water by touching it with your finger—it should feel like bathwater, not scalding.
If your yeast doesn’t foam within 5-10 minutes, it’s dead, and you’ll need to start over. Pro tip: Store your yeast in the freezer to keep it fresh longer.
Underproofing the Dough
Rushing the rise is a common mistake. If the dough doesn’t double in size during the 1-1.5 hour first rise, it won’t develop that signature chewy texture. A cold kitchen?
Place the bowl near the oven with the light on (the heat helps) or use a proofing box if you have one. Patience here makes all the difference—don’t be tempted to punch down underproofed dough.
Overbaking for Crust
Baking until the crust is perfectly golden is tempting, but overbaking dries out the bread. Aim for an internal temperature of 190°F—any higher, and the asparagus flavor becomes muted.
The cornmeal topping adds crunch without needing extra bake time. If your oven runs hot, reduce the temperature by 25°F and check early.
Ignoring the Cooling Phase
Slicing bread too soon traps steam inside, making it gummy. Let your asparagus bread cool in the pan for 10 minutes before transferring to a wire rack.
This allows the crust to set while keeping the interior moist. Trust me, the wait is worth it—every slice will be perfectly textured. ✨
Nutrition facts
Frequently asked questions
Can I make this asparagus bread without roasting the asparagus first?
Roasting the asparagus is key for flavor and texture—it removes excess moisture and concentrates the sweetness. If you skip roasting, blot chopped raw asparagus with paper towels first to prevent a gummy loaf. The flavor won't be as rich, but it will still work in a pinch. For best results, always roast!
How do I know when the dough has risen enough?
The dough is ready when it's doubled in size and springs back slowly when gently pressed. For this recipe, that's about 1-1.5 hours at room temperature. If your kitchen is cold, place the bowl near the oven with the light on (the warmth helps). Never punch down underproofed dough—it needs that full rise for chewy texture!
What can I substitute if I don't have fresh asparagus?
Try finely chopped spinach or Swiss chard—both work well! Squeeze out excess moisture first to avoid a soggy loaf. For a different flavor profile, sun-dried tomatoes (chopped) or roasted zucchini can also be used. The key is using vegetables with mild flavors that won't overpower the bread's taste.
Why did my bread turn out dense instead of chewy?
Overmixing the dough (more than 5-7 minutes) or underproofing are common culprits. The asparagus adds moisture, so knead just until smooth. Also, ensure your yeast is active and the water is warm (110°F). If your kitchen is cold, extend the rise time—patience is key for that perfect chewy texture!
Can I make this bread ahead of time?
Wrap the cooled loaf tightly in plastic and store at room temperature for 1-2 days. For longer storage, freeze it for up to 3 months. To reheat, wrap in foil and warm in a 350°F oven for 10 minutes. The asparagus flavor actually improves as it sits, making it even more delicious the next day!